Ensuring Excellence: How Ahaus Approaches Quality Control in Custom Workholding and Automation
Ahaus Tool and Engineering, a leader in custom workholding and custom automation, has made quality control a cornerstone of its operational philosophy. The company puts quality above every other initiative and has multiple quality objectives ranging from on-time delivery to sustainable cost of goods sold. At Ahaus, we know that we only achieve success by delivering effective, reliable, and timely solutions for our customers.
There are two crucial aspects of Ahaus's quality control framework: the ISO 9001:2015 certification that governs its internal processes and the meticulous physical quality control and assurance practices employed in the inspection and measurement of its systems and products.
ISO 9000:2015 Certification – Ahaus's Commitment to Excellence
Ahaus Tool and Engineering's quality commitment is evident in its adoption of the ISO 9001:2015 certification. This standard, developed by the International Organization for Standardization (ISO), sets the criteria for a quality management system that enhances customer satisfaction and drives continual improvement. The certification demonstrates Ahaus's dedication to maintaining rigorous quality control across all aspects of its operational business.
The ISO 9000:2015 standard necessitates regular audits, assessments, and reviews, which prompt the company to identify areas for refinement and innovation. By constantly seeking ways to optimize its processes, Ahaus ensures that its products meet or exceed the highest quality standards.
Precision in Action: Physical Quality Control and Assurance
While ISO 9001:2015 certification governs internal processes, Ahaus Tool and Engineering's commitment to quality extends beyond documentation and into the realm of physical product inspection and measurement. This hands-on approach ensures that each manufactured item leaving the production line meets the stringent standards set by the company. Ahaus takes a multifaceted approach to physical quality and precision:
- State-of-the-art equipment: Ahaus invests in cutting-edge inspection equipment that enables the accurate measurement and assessment of its systems.
- Thorough inspections: Ahaus's quality control process involves thorough inspections at multiple stages of production. Each product undergoes meticulous scrutiny, from raw material inspection to final assembly.
- Data-driven decision making: Ahaus leverages data collected from inspections to drive informed decision-making. Read more about our data analytics capabilities here.
- A culture of quality: The other facets of our approach don’t work without a meaningful culture of quality. We have been cultivating our culture of quality for over 75 years. Behind every inspection is a team of skilled and trained professionals who understand the importance of precision and consistency. Ahaus's workforce is not only equipped with technical expertise but also embodies a commitment to upholding the company's reputation for quality.

Workholding Quality: A Crucial Component
Workholding quality assurance is all about tolerances. Workholding involves securing and positioning a workpiece during machining, assembly, or inspection, and tolerances are instrumental in this process, paving the way for consistency and reproducibility. Clearly defined tolerances facilitate uniform and repeatable results across multiple workpieces. This proves invaluable in scenarios such as mass production or assembly line setups, where identical workholding configurations are employed.
Tolerances hold the key to dimensional accuracy. They act as a safeguard, ensuring that the final dimensions of a workpiece align precisely with the intended design specifications. Ahaus’s workholding tolerances are customized to each customer part or process.
“From the workholding perspective, the mechanical engineer creates an inspection drawing, and places tolerances on that inspection of our workholding based on the customer's part print,” Ahaus Project Engineer Mark Engle elaborates. “If you have a wide range of casting tolerances, then the workholding has to accommodate the wide range of casting tolerances that are there, and sometimes customer parts are outside of their casting tolerances per print.”
In the realm of tool life optimization, accurate workholding is key to long-term success. Secure workholding within defined tolerances empowers cutting tools to perform their tasks with enhanced efficiency and predictability. This not only improves the quality of the machined surfaces but also extends the longevity of cutting tools by mitigating excessive wear resulting from vibrations or erratic movements.
While workholding and fixture design can seem simple and straightforward, developing workholding systems also requires a great deal of creativity. We are trying to reach certain precision goals with input materials that have their own variances, parts that weren’t designed with workholding in mind, and finished products that may not be typical of traditional large-scale production.
“A really challenging aspect of the workholding world that we deal with on a daily basis is many of our customers are designing products that are not really designed for manufacturing,” says Price. “That puts more of a challenge on us to come up with creative ways of holding and fixturing the components to allow accurate machining in a way that will remain stable.”
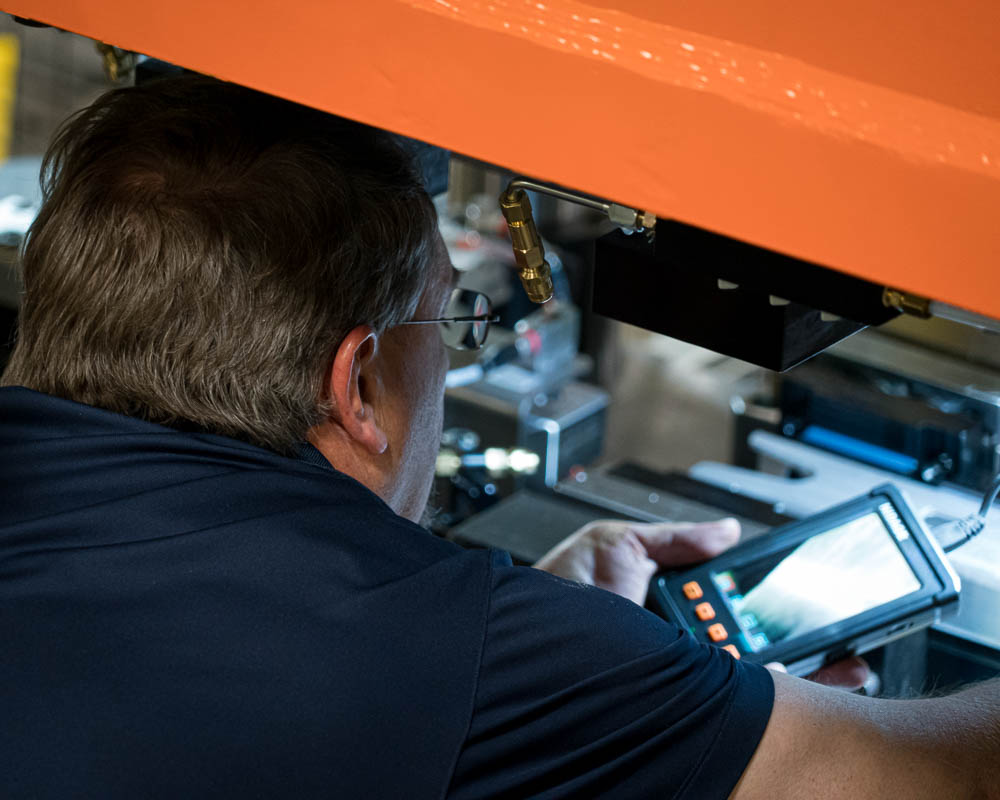
Ahaus tests its workholding systems as much as possible internally before the device ever reaches the customer, ensuring that when the customer receives the system, it’s not the first time that fixture has been pressurized, actuated, and tested.
Price added: “When the customer receives a workholding device, we've already spent a number of hours going through its cycling to ensure the sequence of events are occurring correctly, that we're not seeing any prevalent leaks, and that structurally, everything is sound and it's behaving the way we would expect.”
Dimensional accuracy, clamping force, repeatability, and stability are just a few of the parameters that undergo scrutiny during Ahaus’s various quality inspections. But while stability is important, quality control is by no means a static endeavor; it is a dynamic process driven by a culture of quality. The lessons we learn from each project contribute to a collective pool of knowledge, fueling innovation from the ground level.
Need an Expert?
Need the Proof?
Quality, Automated: The Ahaus Automation Advantage
When it comes to precision tooling and engineering, even the slightest deviation from specifications can lead to significant repercussions down the line. And when it comes to automation, the stakes are even higher. Quality control serves as a safeguard against potential hazards that may arise from malfunctioning or improperly calibrated automation systems. Thorough testing and validation procedures ensure that automation machines adhere to strict safety regulations and protocols, mitigating risks associated with electrical faults, mechanical failures, and other unforeseen events.
The success of automation machines and systems is not measured solely by short-term gains; rather, it hinges on long-term sustainability and return on investment. Incorporating quality control practices into the manufacturing of automation machines establishes a foundation for continuous improvement.
“Quality control is important in automation for multiple reasons,” said Jeff Sheridan, Ahaus Vice President. “The first being that quality of all the components that are used in the equipment is critical. Whether it's manufactured components by Ahaus or purchased components – like motors and actuators and sensors – it is important that all those components are at a high-quality level, that they're meeting all their individual specs, so when we assemble them, the process goes smoothly and the equipment functions and performs as intended.”
Ahaus’s focus on quality extends to the automation systems the company builds for its customers. Sheridan continued: “Another aspect of automation that's really important is when actual functions of the automation have to do with the end product quality. In the past, you may have had a system that was putting some parts together in an assembly operation, but there weren't necessarily any in-process checks. Now it is much more common to keep checking the quality at every step in the process, this prevents you from getting a full assembly complete and then realizing during final inspection that something was not correct. The goal is that the customer knows that the part coming off of that machine is to the quality levels that needs to be.”

Ahaus is able to implement automated quality control systems that provide real-time monitoring and data analytics capabilities. This means that the customer can track and analyze production data instantaneously, identifying trends, anomalies, and potential issues before they escalate. These proactive insights empower the decision-making process and allow for quick adjustments to be made, optimizing manufacturing processes.
By collecting and analyzing data from quality control processes, manufacturers can identify patterns, trends, and potential areas for enhancement. This data-driven approach empowers companies to iteratively refine their designs, components, and processes, ultimately driving innovation and maintaining a competitive edge in a rapidly evolving landscape.
Quality = Precision
At Ahaus, “quality” is synonymous with “precision.” And when it comes to manufacturing, “precision machining” is synonymous with tight tolerances and exacting specifications. Ahaus’s quality control process acts as a guardian, monitoring and verifying the dimensions of every machined component. By employing advanced metrology tools such as coordinate measuring machines (CMMs) and laser scanners, Ahaus can verify that each intricate feature, contour, and angle meets the exact requirements specified in the design.
It all comes back to tolerances.
“Those CMM machines are very accurate,” added Sheridan. “They're accurate down to within 2 ten-thousandths of an inch throughout their full range of motion. Every part that that is made by any manufacturing company is going to have features on it, and those features have tolerances. Sometimes those tolerances can be very tight, so it's important that we get it to within that tolerance, but we don't want to get to a point where we’re not being efficient with our resources, or ‘over machining’ if you will, so that we can produce high quality parts but we’re doing it efficiently and meeting the needs of our customers while still being competitive.”

A Culture of Quality
Ahaus trains all new employees in quality control, including taking measurements, cleaning parts, reading drawings to check tolerances, and so on. Quality control isn't the responsibility of a single department; it's a shared endeavor. Ahaus's work culture emphasizes accountability and ownership at every level. From the newest members of our acclaimed apprenticeship program to our executive team, everyone takes pride in their role, knowing that their contributions directly impact the final product. This sense of ownership fuels a collective commitment to maintaining the highest quality standards.
Our dedication to quality control isn't just a practice; it's a statement we make, to transform challenges into opportunities and set the stage for a future defined by our commitment to quality. Here’s the full Ahaus Quality Statement, our promise:
Quality Statement: Achieve success by delivering effective, reliable, and timely solutions for our customers.
Our Quality Objectives:
- On time delivery
- Low warranty cost
- Low rework cost
Sustainable cost of goods sold

